

In my experience, the more canvas apps you create, the better you want them to look. And the more you advance in creating those visually appealing canvas apps, the more likely you are to hit a hard limitation or two with your visual design. Capabilities you expect would be natively available, like rich custom fonts, color gradients and element drop-shadows, are curiously unavailable through no-code means. We’ve had those in Microsoft Office for decades!

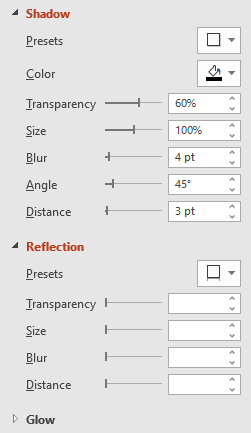
just a few of the options from PowerPoint I would love to see made available in the canvas App Studio
For the citizen developer, these limitations are unlikely to ruffle any feathers. There are 14 available fonts, 20 standard color themes (and fairly easy-to-implement custom color themes) and plenty of icons and shapes to satisfactorily craft your app’s design. Need to get around a limitation? Just upload some custom media—like transparent custom font PNGs and background images— and you’re good to go.
Visual designers, front-end web developers and other pro dev app makers may not be so easily persuaded. When it comes to production apps for the enterprise, the app’s visual design is paramount. And, with only 200 MB of media storage per app, not everything should be solved with an uploaded image.
where pro code meets low code
I first came across this concept when I was curious if there was a way to create a gradient color in canvas apps. My company’s main brand colors are gradients, and I wanted my app to reflect that.
Like most things in Power Apps, I held a lot of assumptions on the difficulty and practicality of such a feat:
I can do this with just a few clicks in Office products, I thought, naïvely. This should be a piece of cake.
After an exhaustive search engine rabbit hole and a lot of trial and error, I cracked the pattern of using the HTML Text control to not only make a color gradient for my header background, but also light up a lot of other very interesting visual design options. Not everything that you can do in web development can be done inside an HTML Text component, but it certainly adds a fresh set of tools for making beautiful apps.
In this blog, I will cover 3 possible uses for embedded CSS within canvas apps (and whether or not they’re a good idea!)
for citizen developers
If you’ve read my bio, you may be aware that I dabbled in web development (during high school, an unnamed number of years ago). Don’t let this fool you: I’m certainly not a trained or experienced web developer, and my skill level with these front-end coding languages is rudimentary at best. Even without prior experience, these methods are 100% achievable by citizen developers. While my base level of knowledge is helpful, I still rely on a lot of trial & error (and looking stuff up online) when working on concepts outside of my normal skill set.
If you plan to implement an HTML Text feature into your canvas app, it will be helpful to become familiar with some of the basics so you are able to modify the code snippets to fit your use case without too much fuss. I like codecademy for a guided course, but there are also tutorials available from W3 Schools: HTML & CSS.
fonts
Typography is a foundational element in any organization’s brand identity. Fonts can convey a lot about personality, style, purpose and intent. We’ve all been victims of bad fonts in the past (especially in presentations) leaving us with negative impressions not intended by the creator. So, when you create your canvas app, whether it’s for a small team or a large enterprise, you want to ensure your app presentation sends all the right messages, all the way down to the fonts.
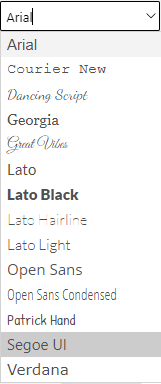
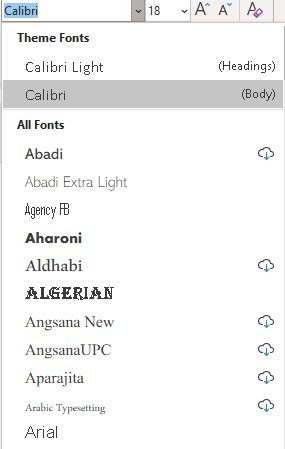
The App Studio comes with a small number of fonts, including a few old standbys like Arial, Courier New, and Verdana.
There are two fancy script fonts with bold names like Dancing Script and Great Vibes. There’s a handwriting font named Patrick Hand. Georgia is the only serif font in the mix.
For custom fonts, we must use alternative methods. There are a variety you could explore across a range of no-code and pro-code options, but in this post we’ll look at how to leverage CSS Font Families.
how to implement
- In place of a standard text Label component, insert the HTML Text component.
- In the HTMLText property, remove the placeholder text and replace with your label text, wrapped in double-quotes.
"Submit"- Add HTML tags around the text. You can use
<div>or<p>tags.
"<div>Submit</div>"- Inside the
<div>tag, addstyle=and set the CSS font family.
"<div style='font-family: Century Gothic;'>Submit</div>"- Add additional font properties, as desired, to set fallback font families, font size and color.
"<div style='font-family: Century Gothic, sans-serif; font-size: 40px; color: #75adaf;'>Submit</div>"- Adjust hard-coded properties with variables by breaking the HTML text with double-quotes and ampersands.
"<div style='font-family: Century Gothic, sans-serif; font-size: 40px; color: "&PrimaryButton_Fill&";'>Submit</div>"
downsides
I like this concept; I think it’s cool. But is it practical? Is it better than using the standard fonts, or more advantageous than other custom font options? Probably not.
CSS fonts are at the mercy of the browser to interpret them correctly. You can look through examples online (this font list from TutorialBrain was helpful) to see how different CSS font families are rendered in your browser of choice.
What does this mean for canvas apps? For starters, not all fonts you see on CSS web-safe font lists are going to render within the App Studio. Further, CSS font families that work when you’re creating the app may not render properly for your users when they play the app, as not all browsers support all fonts. For example, I played my demo app on my Samsung Galaxy mobile phone, and the chic Century Gothic submit text had been boiled down to the sans-serif default of Arial. This would be a lot of extra steps just to have Arial be the displayed font for all my mobile users!
You also want to take care to follow step #6 above to avoid hardcoding properties for elements like color or size. Adding the CSS color: #75adaf; tag in the style does override the Color property of the HTML Text component, which would disconnect this text from any of the color theme management I had implemented in my app. Breaking up the HTMLText code to insert variables or other app properties can help tightly integrate the HTML Text components into the rest of your app.
Ultimately, this concept might not be employed very often. But it does set us up nicely to learn what else we can embed in the HTML Text component!
It’s also probably a good time to mention these sage words of wisdom:

color gradients
Color gradients are visually interesting. They add depth and diversity to your color tones; they can be a great way to subtly direct and guide users to certain areas of an app. While flat, minimal designs have dominated the visual brand landscape for the past decade or so, gradients are back in fashion. It’s time to get onboard and bring color transitions into your canvas apps, too!
The first time I wanted a more complex color gradient in one of my apps, I made the image in PowerPoint and uploaded it as a background image. This is a perfectly fine way to solve the challenge, but it quickly becomes an undesirable choice when you need more than just a static image or two to achieve your design. If you need the gradients to change colors, if you want a color gradient to auto-resize based on another canvas app component, or if you have a lot of them in your design, then adding a CSS Gradient via HTML Text is the way to go.
how to implement
- Insert the HTML Text component onto your screen. In my example, I will be creating a background gradient, so I’ve set the following properties:
- Height:
Parent.Height - Width:
Parent.Width - X: 0
- Y: 0
- Padding: 0
- Height:
- In the HTMLText property, remove the placeholder text and replace with an empty
<div>, wrapped in double-quotes.
"<div></div>"- Adjust the height and width of the
<div>based on the HTML Text component Height and Width properties. To reference variables or other properties, break the HTML with double-quotes (“) and use ampersands (&) to concatenate.
"<div style='width:"& Gradient_HTMLText.Width &"px; height:"& Gradient_HTMLText.Height &";'></div>"- Add the gradient CSS code. I’m using a radial gradient with my light teal color in the middle and the darker teal color on the outside.
- You can adjust the blend by changing the %s next to the RGBA() values. You can also use hex color codes instead of RGBA().
- You can also try a linear gradient.
- There are various WYSIWYG CSS gradient generators available online, too!
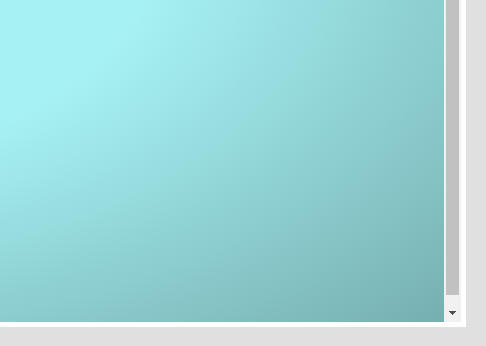
"<div style='width:"& Gradient_HTMLText.Width &"px; height:"& Gradient_HTMLText.Height &"px; background: radial-gradient(rgba(166,241,243,1) 40%, rgba(117,173,175,1) 100%);'></div>"At this point, you should successfully see a gradient appear in the canvas app! However, you may have also noticed a scroll bar has appeared in your component.
Side note: if you also see a small 5px border as pictured in this screenshot, check the HTML Text component Padding properties. They should all be set to 0px.
- The
<div>element in your HTML Text needs to be slightly smaller than the HTML Text component itself to avoid the automatic application of a scrollbar. We can accomplish this by updating the<div>height to the component Height – 1.
"<div style='width:"& Gradient_HTMLText.Width &"px; height:"& Gradient_HTMLText.Height - 1 &"px; background: radial-gradient(rgba(166,241,243,1) 40%, rgba(117,173,175,1) 100%);'></div>"- This does leave a 1px gap at the bottom of the screen. Adjusting the Height property of the HTML Text component should do the trick to fill it in.
- Height: Parent.Height + 1

color gradients in text?
Now that you’ve mastered the art of making background shapes with HTML Text color gradients, you may move onto the next logical idea: can you apply a color gradient to text in Power Apps? The short answer is: no.
This can be done with CSS, employing WebKit or Mozilla extension prefixes when necessary for browser compatibility. It sets the background to your specified gradient, sets the font color fill to transparent, and then clips the background around the text.
It does not work in canvas apps! Adding any of the below CSS code snippets has no effect on how the text or background gradient is rendered.
background-clip: text;
-webkit-background-clip: text;
-webkit-text-fill-color: transparent;
To add any text with color gradients instead of solid fill, you’ll need to create an image with a transparent background outside of Power Apps and import it into the App Studio as media.
drop shadows
I saved the best for last. My favorite use of the HTML Text component is to add drop shadows to canvas app components!
Adding shadows into your design is easy to overdo (and quite a controversial subject in the design community in recent days), but it’s an effective way to create depth and distinguish between different elements on the screen.
I created this method for a canvas app which had a dropdown menu effect when the user clicked on a hamburger menu icon. The menu was flat and appeared to intersect with the existing screen elements. After I added in a subtle drop shadow, the menu had a much better overall effect and gave the correct impression that the menu was “floating” on top of the screen:


how to implement
- Identify the component where you will add the shadow. Insert the HTML Text component onto the same screen.
- Set the size properties to match your component. In this example, I have a rectangle icon named
ico_WelcomeSplashthat I want to give a shadow. In my HTML Text component, I set the following properties to ensure the shadow is always the same as the component. We’ll come back and adjust some of these later.- Height:
ico_WelcomeSplash.Height - Width:
ico_WelcomeSplash.Width - X:
ico_WelcomeSplash.X - Y:
ico_WelcomeSplash.Y - Padding: 0
- Height:
- In the HTMLText property, remove the placeholder text and replace with a
<div>and setting the style height and width elements as we did with the color gradients. Ensure all of it is wrapped in double-quotes and use ampersands to concatenate for any breaks in the HTML.
"<div style='width:"& ico_WelcomeSplash.Width &"px;height:"& ico_WelcomeSplash.Height &"px;'></div>"- Add the CSS code for a box shadow.
- The syntax is
box-shadow: offset-x | offset-y | blur-radius | spread-radius | color. - Try using a box shadow generator to visualize the shadow and generate the code for you.
- I am using a medium gray color, offset by 4px with an 8px blur and no spread.
- The syntax is
"<div style='width:"& ico_WelcomeSplash.Width &"px;height:"& ico_WelcomeSplash.Height &"px; box-shadow: 4px 4px 8px 0px rgba(51,51,51,1);'></div>"- The shadow code is set up, but we still can’t see it. That’s because the component and the shadow are perfectly aligned, and the component sitting on top is hiding it. Let’s adjust the height and width to properly offset the shadow.
- First, set the main component visibility to false so we can see the shadow while we work. You’ll probably notice that, at first, the box-shadow isn’t visible and we have the automatic scrollbar to contend with. (This will be resolved in the next step.)
- Next, increase the HTML Text component Height & Width properties by 10px. Notice the scrollbar disappears and the shadow appears! Progress.
- Height:
ico_WelcomeSplash.Height + 10 - Width:
ico_WelcomeSplash.Width + 10
- Height:
- Adjust the amount of pixels added to the Height and Width until your shadow looks right and is not being cut off. The amount will vary based on the box-shadow code you added. Bigger shadow = add more pixels.
- I added 15px to Height and Width for the box-shadow code I’m using in this example.
- Set the main component visibility to true. Continue adjusting as necessary to get a perfect fit!
- For a punchier effect, try playing with the color of the shadow, using complementary colors for bigger contrast. Reduce the blur-radius value for a stronger shadow. Increase the spread-radius for a thicker shadow.
- For a more subtle effect, change the alpha value of the shadow color to decrease its opacity. Use a lighter, neutral color for the shadow. Increase the blur-radius to spread out the shadow.
- Try this code snippet for a very light shadow effect:
box-shadow: 4px 4px 10px 0px rgba(100,100,100,.5);
- Try this code snippet for a very light shadow effect:
- Adjust the HTML Text component Height and Width as needed to accommodate your shadow.
conclusion
The HTML Text component is an excellent option for bringing your app’s visual design to life, pushing beyond what the App Studio offers out-of-the-box and leveraging classic web development skillsets which are widely documented. I would still classify this as low code development given the wealth of tutorials, WYSIWYG CSS generator applets and low syntax overhead of implementation.
While the CSS font-family option is not my top option for custom fonts in canvas app, I love to bring in HTML text for gradient and shadow effects. Just one look at my demo app’s welcome screen before-and-after should convince you, too!


My implementations are fairly simple examples. I’d love to see what other effects pro developers could bring to canvas apps through the HTML Text component— I’m sure there’s a lot out there to explore!


I enjoy the way you explain html text in Powerapps.
I have created a linear gradient to fill the header, of which the size is dependent on the parent container. I would like to add centered html text within the div statement. I can’t find an example of how to do this. Can you help?
LikeLike
Hi Mark,
Any text you wish to add directly into your HTML Text control can be within the tags. You can add attributes to the div style to describe the text such as “font-family”, “font-size” and “text-align” (e.g., “div style=’font-family: Century Gothic; font-size: 80px; text-align: center;’>Welcome!</div") [Don't forget to add back the missing brackets which I removed so Word Press would show you the code!]
Alternatively, you can also add a Label control above the HTML Text control that is centered across the gradient using Power Fx code in the X and Y properties of the label (e.g., Label.X = HTML.X + HTML.Width/2 – Self.Width/2).
Hope that helps! /joy
LikeLike
Very interesting subject , appreciate it for posting.
LikeLike